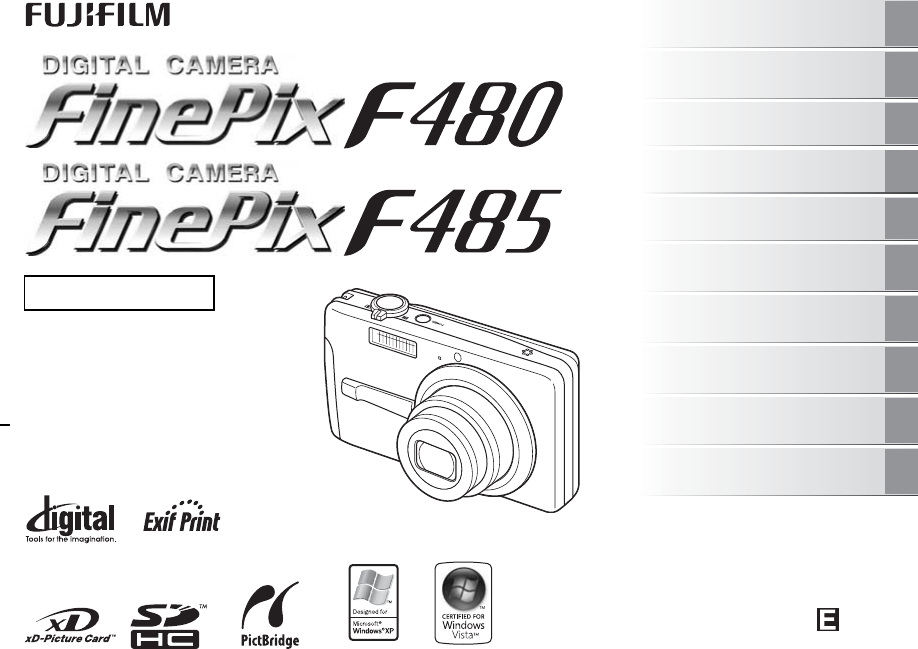
Fujifilm FinePix F480 Owner's Manual
Browse online or download Owner's Manual for Camcorders Fujifilm FinePix F480. Fujifilm FinePix F480 Owner's Manual User Manual
- Page / 132
- Table of contents
- TROUBLESHOOTING
- BOOKMARKS
- OWNER’S MANUAL 1
- IMPORTANT 3
- EC Declaration of Conformity 4
- Contents 6
- Usable Memory Cards 7
- About this Manual 8
- Accessories Included 9
- Camera Parts and Features 10
- Z Photography mode 11
- Z Playback mode 11
- Charging the Battery 12
- Loading the Battery 14
- 3 Close the battery cover 15
- Loading the Memory Card 16
- Turning On and Off 19
- 2 Set the date and time 20
- 3 Change the date format 21
- Checking the battery charge 22
- Correcting the Date and Time 23
- Selecting the Language 24
- Taking Pictures (AUTO Mode) 25
- Best framing 31
- Viewing the Images 32
- 1 Zoom in / Zoom out 33
- Multi-frame playback 34
- Sorting by date 35
- Erasing the Images/Movies 36
- Setting the Shooting Mode 41
- Clear scenic shots 42
- Shooting Mode 43
- [m PORTRAIT] 44
- [, LANDSCAPE] 44
- [. SPORT] 44
- [8 NIGHT] 44
- [ SUNSET] 46
- [ FLOWER] 46
- [ PARTY] 47
- [ MUSEUM] 47
- [ TEXT] 47
- [s MANUAL] 47
- [c SLOW SYNCHRO] 50
- [n RED EYE & SLOW] 50
- * Self-Timer 51
- Increasing the LCD monitor 53
- Using [SHOOTING MENU] 54
- [SHOOTING MENU] 57
- Adjusting exposure 59
- ([ EXP. COMPENSATION]) 59
- Adjusting color balance 60
- ([ WHITE BALANCE]) 60
- Taking pictures continuously 61
- ([ CONTINUOUS]) 61
- Using [PLAYBACK MENU] 62
- [PLAYBACK MENU] 63
- [WITH DATE] / [WITHOUT DATE] 64
- Protecting the images 67
- ([ PROTECT]) 67
- Copying the images 68
- ([ COPY]) 68
- Rotating the images 71
- ([ IMAGE ROTATE]) 71
- 1 Select the menu 72
- 3 Record the image 73
- • Optical zoom focal length 74
- Max. zoom scale: 4× 74
- • Focal range 74
- Record movies 75
- Adjusting volume of movies 77
- [ SET-UP] 78
- [SET-UP] menu option 79
- [ SET-UP] 80
- [FRAME NO.] 81
- [DIGITAL ZOOM] 82
- Settings 83
- [LCD BRIGHTNESS] 84
- [FORMAT] 84
- 3 Set time difference 86
- Connecting to a TV 87
- Connecting to a printer 88
- ([PRINT WITH DATE] / [PRINT 89
- WITHOUT DATE]) 89
- Printing with DPOF setting 90
- ([u PRINT DPOF]) 90
- PRINTING 91
- Installation on a Windows PC 92
- For Windows Vista users: 93
- Installation on a Mac OS X 94
- Connecting to a PC 97
- Vista case) 99
- Using FinePixViewer 100
- Macintosh 101
- System Expansion Option 102
- Accessories Guide 103
- Using Your Camera Correctly 105
- Notes on the 106
- Warning Displays 107
- Continued Q 109
- Troubleshooting 111
- Z Shooting 112
- Z Playing back 114
- Z Others 116
- Specifications 117
- Explanation of Terms 124
- Printed in China 132
- Y-709108-PY 132
Summary of Contents
OWNER’S MANUALThis manual will show you how to use your FUJIFILM DIGITAL CAMERA FinePix F480 / FinePix F485 correctly.Please follow the instructions c
10Camera Parts and Features• Refer to the pages in parentheses for information on using the camera parts or features.A Shutter buttonB POWER buttonC S
100Connecting to a PCUsing FinePixViewerFor all information on FinePixViewer functions, refer to [How to Use FinePixViewer] in the Help menu for detai
101Software InstallationDWhen the message appears, click the [OK] button. Check your selection carefully since the process cannot be canceled once you
102System Expansion OptionBy using FinePix F480 / FinePix F485 together with other optional FUJIFILM products, your system can be expanded to fill a w
103AppendicesAccessories GuideVisit the FUJIFILM web site for the latest information on camera accessories.http://www.fujifilm.com/products/digital/in
104Accessories Guide• DC Coupler CP-40NUse the CP-40N with AC-5VX when taking pictures or play back images for long periods or when FinePix F480 / Fin
105AppendicesUsing Your Camera CorrectlyRead this information and the “Safety Notes” (➝“Notes and Cautions”), to make sure you use your camera correct
106Notes on the xD-Picture Card™, the SD Memory Card and the Internal MemoryZ Handling Memory Card• When inserting the Memory Card into the camera, ho
107AppendicesWarning DisplaysThe table below lists the warnings that are displayed on the LCD monitor.Warning Displayed Explanation Remedy (Lit red)V
108Warning Displays[CARD ERROR]• The Memory Card contact area is soiled.• The Memory Card format is incorrect.• Camera fault.• The Memory Card is dama
109Appendices[READ ERROR]• The played back file was not recorded correctly.• The Memory Card contact area is soiled.• Camera fault.• An attempt was ma
11Example of LCD Monitor Text DisplayZ Photography modeZ Playback modeFinePix F480 / FinePix F485 has internal memory that can store images without Me
110Warning Displays[CAN NOT ROTATE][r CAN NOT ROTATE]An attempt was made to rotate a movie or an image shot using a camera other than FinePix F480 / F
111TroubleshootingTroubleshootingZ Getting readyZ Setting menu etc.Continued QMatters Problems Possible causes Solutions PageBatteries and power suppl
112TroubleshootingZ ShootingMatters Problems Possible causes Solutions PageBasic operationsNo photograph is taken when pressing the shutter button.The
113TroubleshootingContinued QFlashCannot use the flash.The shutter button was pressed while the flash was charging.Wait until the charging is complete
114TroubleshootingZ ShootingZ Playing backMatters Problems Possible causes Solutions PageRecording imagesPhotographed images or movies are not recorde
115TroubleshootingZ ConnectingContinued QMatters Problems Possible causes Solutions PageConnecting to TVThere is no image or sound on the TV.The camer
116TroubleshootingZ OthersMatters Problems Possible causes Solutions PageCamera operation etc.Nothing happens when pressing the buttons on the camera.
117SpecificationsContinued QSystemModelDigital camera FinePix F480 / FinePix F485Effective pixels 8.15 million pixelsCCD 1/2.5-inchStorage media Inter
118SpecificationsSystemDigital zoom Approx. 6.9× (4× optical zoom lens is used together: Max. zoom scale: approx. 27.6×)Aperture (Wide-angle) F2.7/F5.
119SystemWhite balance Automatic scene recognition/Preset (Fine, Shade, Fluorescent (Daylight), Fluorescent (Warm White), Fluorescent (Cool White), In
12Charging the BatteryThe battery is not fully charged at shipment and must be fully charged before being used.Z Compatible batteryRechargeable Batter
120SpecificationsGuide to the number of available frames for battery operationAccording to the CIPA (Camera & Imaging Products Association) standa
121Continued QBattery NP-40NNominal voltage DC 3.6VNominal capacity 760 mAhOperating temperature 0°C to +40°C (+32°F to +104°F)Dimensions 35.3 mm × 40
122SpecificationsZ Standard number of available frames/recording time per xD-Picture Card , SD Memory Card and internal memory The number of available
123If you shoot using the xD-Picture Cards with model numbers containing “M” such as DPC-M2GB, movie recording time may be reduced if you repeatedly r
124Explanation of TermsEVA number denotes Exposure Value. The EV is determined by the brightness of the subject and sensitivity (speed) of the film or
125FUJIFILM Digital Camera Worldwide NetworkIf you have technical questions or if you need repair service, ask the following local distributor.Please
126FUJIFILM Digital Camera Worldwide NetworkEcuadorImportaciones Espacri Cia. Ltda.Technical support &Repair serviceSimón Bolivar 5-69 y Hno. Migu
127CyprusDoros Neophytou CAMERA REPAIRSTechnical support &Repair service28B, Agiou Demetriou, Acropoli, NicosiaTEL 35722314719 FAX 35722515562 d
128FUJIFILM Digital Camera Worldwide NetworkMaltaCiancio (1913) Co.Ltd.Technical support &Repair serviceFuji Tech Centre, Ciancio House, Cannon Ro
129SwedenFujifilm Sverige ABTechnical supportSveavägen 167 104 35 StockholmTEL 46 8 506 141 70 FAX 46 8 506 142 09 [email protected] servic
13Getting Ready2 Plug the battery charger into a power outlet.The charging indicator lights orange and charging begins. When charging is completed, th
130FUJIFILM Digital Camera Worldwide NetworkSyriaFilm Trading CompanyTechnical supportAl-Shahbandar P.O. Box:31180 Damascus SYRIATEL + 963 11 2218049
131IndonesiaPT Modern Photo TbkTechnical support &Repair serviceJl.Matraman Raya 12, Jakarta Timur 13150TEL +62 021 2801000 FAX +62 021 8581620+6
7-3, AKASAKA 9-CHOME, MINATO-KU, TOKYO 107-0052, JAPANhttp://www.fujifilm.com/products/digital/Printed in ChinaY-709108-PY
14Loading the Battery1 Open the battery cover.CHECKCheck that the camera is turned off before opening the battery cover.CAUTION• Do not open the batte
15Getting Ready3 Close the battery cover.MEMOIf you want to use the camera powered by AC, the AC power adapter, AC-5VX, and DC coupler, CP-40N (both s
16Loading the Memory CardAlthough you can store pictures in the camera’s internal memory, you can store many more images on the Memory Card (sold sepa
17Getting ReadyCAUTIONBe sure to unlock the protection of the SD Memory Card before inserting it. If it is locked, recording/deleting images, as well
18Loading the Memory CardCAUTION• When storing Memory Cards, make sure that they are kept out of the reach of children. A Memory Card could be swallow
19Getting ReadyTurning On and OffTurning the camera on in Photography modePress POWER down fully to turn the camera on.Press POWER again to turn the c
2WarningTo prevent fire or shock hazard, do not expose the unit to rain or moisture.For customers in the U.S.A.Tested To Comply With FCC Standards FOR
20Turning On and OffSetting the language, date, and timeWhen using the camera for the first time after purchasing, the language, date, and time are cl
21Getting Ready3 Change the date format.Date formatex. December 1, 2007[YY.MM.DD]: [2007.12.1][MM/DD/YY]: [12/1/2007][DD.MM.YY]: [1.12.2007]MEMOSTART
22Turning On and OffChecking the battery chargeTurn the camera on and check the battery level indicator on the LCD monitor.AThere is ample battery cha
23Getting ReadyCorrecting the Date and Time1 Open the [SET-UP] menu. 2 Display the [DATE/TIME] screen.APress MENU/OK to open the menu.BPress n or o to
24Selecting the Language1 Open the [SET-UP] menu. 2 Display the [ ] screen.APress MENU/OK to open the menu.BPress n or o to select [ SET-UP].CPress
25Using the CameraTaking Pictures (AUTO Mode)This section describes the basic operations.1 Turn the camera on.APress POWER down fully to turn the came
26Taking Pictures (AUTO Mode)2 Check the composition on the LCD monitor.To adjust zoom scale using the Zoom switch:MEMO•Select e Macro mode to take cl
27Using the CameraCAUTIONWhen pressing the shutter button halfway, a lens operation sound may be heard.4 Press the shutter button fully.CAUTIONWhen ta
28Taking Pictures (AUTO Mode)Z Indicator lamp displayThe indicator lamp lights or blinks when pressing the shutter button, etc. The indicator lamp sho
29Using the CameraTaking pictures with the focus and exposure lockedIn the above composition, the subjects (two people in this case) are not in the AF
3IMPORTANTBe sure to read this page before using the software.NOTICEBEFORE OPENING THE CD-ROM PROVIDED BY FUJIFILM Corporation, PLEASE READ THIS END U
30Taking Pictures (AUTO Mode)3 Continue to hold the shutter button down halfway. Move the camera back to the original image and press the shutter butt
31Using the CameraAdjusting the shot compositionSelect the LCD monitor display.Press DISP/BACK to change the LCD monitor display.Position the main sub
32Viewing the ImagesPlay back your images to check them. For important photographs, always take a test shot and view the image to make sure that the c
33Using the CameraSingle-frame playback1 Zoom in / Zoom out.To zoom in an image during single-frame playback:Continued QTo select the required image:P
34Viewing the Images2 Display another part of the image.Z Zoom scales MEMOPressing DISP/BACK cancels playback zoom.Multi-frame playbackMulti-frame pla
35Using the CameraSorting by dateIn sorting by date mode, you can view all images taken on the same day.APress n, o, p, or q to move the cursor (color
36 Erasing the Images/MoviesSetting the camera to wPlayback mode (➝p.32)Use this mode to erase unnecessary images or movies to have ample free space o
37Using the CameraMEMOTo erase another frame (file), repeat above steps.When erasing frames (files) is completed, press DISP/BACK.CAUTIONPressing MENU
38Erasing the Images/MoviesMEMOMEMO• When using a Memory Card, the images in the Memory Card are erased. When not using a Memory Card, the images in t
39Advanced Features — PhotographyUsing the Photography Functions — Procedure of SettingSpecify the camera settings for taking pictures to get the best
4EC Declaration of ConformityWeName: FUJIFILM Europe GmbHAddress: Heesenstrasse 3140549 Dusseldorf, Germanydeclare that the productProduct Name: FUJIF
40Using the Photography Functions — Procedure of SettingZ Specifying functions using [SHOOTING MENU] (MENU/OK button)[ ISO]Use to specify required se
41Advanced Features — PhotographySetting the Shooting Mode You can select the most suitable setting according to the subject by selecting one of the S
42Setting the Shooting ModeBPress MENU/OK to open the menu.CPress n or o to select [ SCENE POSITION].DPress q.EPress n or o to select the setting.FPr
43Advanced Features — PhotographyShooting ModeSetting the mode (➝p.41)This section describes the available shooting modes.Note that the availability o
44Shooting ModeCAUTION• Using the DIGITAL ZOOM allows you to enlarge your subject and shoot it. However, it will lower your image quality. Set the D
45Advanced Features — PhotographyThis mode produces beautiful images that retain the natural ambience when shots are taken in low-light conditions.Thi
46Shooting ModeZ Selecting the exposure time settingUse this mode to shoot sunset, making the colors more vivid.Use this mode to take clear close-up s
47Advanced Features — PhotographyUse this mode for shooting at indoor wedding and party.This mode produces beautiful images that retain the natural am
48e Macro (Close-up)Use this mode to take close-up shots.Available Photography modes: s, AUTO, , , , , (➝p.43, 45, 46, 47)Press e (p) to select M
49Advanced Features — Photographyd Setting the FlashFlash photography is useful for taking pictures at night or indoor dark locations. Choose from 6 f
5Disposal of Electric and Electronic Equipment in Private HouseholdsDisposal of used Electrical & Electronic Equipment (Applicable in the European
50d Setting the FlashThis mode allows you to take pictures of people at night that clearly show both your subjects and the night time backdrop. To pre
51Advanced Features — Photography* Self-TimerThe self-timer is used in situations where the photographer is included in the shot. When photographer is
52* Self-Timer2 Take pictures in selected time.Using the 2-second self-timerThis is useful when you worry about camera shake even if attaching the cam
53Advanced Features — Photographyj Increasing Monitor BrightnessUse this function to increase the brightness of the LCD monitor temporarily when you h
54Using [SHOOTING MENU]Use the [SHOOTING MENU] to adjust image quality. You can take pictures in a wide range of conditions.Setting the [SHOOTING MENU
55Advanced Features — PhotographyZ List of [SHOOTING MENU] options Continued QMenu Functions SettingsFactory default[ SCENE POSITION] (➝p.41)This se
56Using [SHOOTING MENU]MEMONote that the shooting menu will vary depending on the selected shooting mode.• When shooting mode is set to q, , , , m.• W
57Advanced Features — Photography[SHOOTING MENU]Setting the menu (➝p.54)Changing the sensitivity setting ([ ISO])Use this menu to specify required se
58[SHOOTING MENU]Area shot and quality settingNormal shooting provides an aspect ratio of 4:3 and % shooting provides an aspect ratio of 3:2 (same asp
59Advanced Features — PhotographyAdjusting exposure compensation ([ EXP. COMPENSATION])Available Photography mode: s (➝p.47)Use this menu for shots to
6ContentsWarning... 2IMPORTANT...
60[SHOOTING MENU]Adjusting color balance ([ WHITE BALANCE])Available Photography mode: s (➝p.47)Adjust the color balance based on white to suit the c
61Advanced Features — PhotographyTaking pictures continuously ([ CONTINUOUS])Use this mode to take pictures of a moving subject.CAUTION• Number of av
62Using [PLAYBACK MENU]Use this menu to play back photographed images.Setting the [PLAYBACK MENU]APress w to set the camera to Playback mode (➝p.32).B
63Advanced Features — Playback[PLAYBACK MENU] Setting the menu (➝p.62)Setting automatic playback ([ SLIDE SHOW])Use this mode to play back photographe
64[PLAYBACK MENU]Selecting [WITH DATEE], E appears on the LCD monitor and the date will be imprinted on your prints.MEMO Canceling DPOF settingA Press
65Advanced Features — PlaybackMEMO• When DPOF settings were specified on another camera.When the data includes a frame (file) with DPOF settings that
66[PLAYBACK MENU]Z u PRINT ORDER (DPOF)DPOF stands for Digital Print Order Format and refers to a format that is used for recording printing specifica
67Advanced Features — PlaybackProtecting the images ([ PROTECT])Use this mode to prevent frames (files) from being accidentally erased. Your camera c
68[PLAYBACK MENU]MEMO To stop the procedure midwayIf the images are very large, protecting or unprotecting all the frames (files) may take some time.I
69Advanced Features — PlaybackMEMOTo copy another frame (file), repeat steps C and D.When copying frames (files) is completed, press DISP/BACK.Continu
7Protecting the images ([ PROTECT])... 67Copying the images ([ COPY]) ... 68Rotating the images ([ IMAGE ROTATE]) ...
70[PLAYBACK MENU]CAUTION• When [\ MEMORY FULL] or [Y MEMORY FULL] appears on the LCD monitor, copying the data stops on the way.• When copying the ima
71Advanced Features — PlaybackRotating the images ([ IMAGE ROTATE])When shooting in the vertical position, the image appears horizontal on the LCD mo
72[PLAYBACK MENU]Trimming the images ([ TRIMMING]) Use this mode to trim the required part of the photographed image.1 Select the menu.2 Specify trim
73Advanced Features — PlaybackMEMO• Press DISP/BACK to return to single-frame playback.• A saved image size varies depending on the zoom scale of step
74r Recording MoviesUse this mode to record movies.Set the camera to r Movie mode Set the Mode dial to r.CHECKZ Zooming the imageYou must zoom beforeh
75Advanced Features — MovieRecord moviesPress the shutter button down fully to start recording.During recording, [lREC] and a counter that shows the r
76w Playing Back MoviesSetting the camera to wPlayback mode (➝p.32)Z Playing back moviesAPress p or q to select the movie file. r appears on the LCD m
77Advanced Features — MovieMEMOIf the subject of the shot is very bright, white vertical streaks or black horizontal streaks may appear in the image d
78[ SET-UP]Using the [SET-UP] menu1 Open the [SET-UP] menu.2 Change the page.3 Change the setting.APress MENU/OK to open the menu.BPress n or o to se
79Settings[SET-UP] menu optionSetting Display Factory default Explanation Pageq[ IMAGE DISP.] [3 SEC]/[1.5 SEC] [1.5 SEC]Sets the way for displaying
8About this ManualZ About marksCAUTIONThis mark denotes issues that may affect the camera’s operation.CHECKThis mark denotes points to notice in the c
80[ SET-UP][ FORMAT] – –Initializes a Memory Card or internal memory. Select this menu to erase all the frames (files).84[ ] [ENGLISH]Specifies the l
81SettingsUse this function to specify whether frame numbers are assigned consecutively from previous numbers or begin again.CHECKMEMO• Setting this f
82[ SET-UP]Use this function to shoot enlarged images than maximum optical zoom scale.Z Zoom bar displayCAUTIONUsing the [DIGITAL ZOOM] allows you to
83SettingsThe LCD monitor darkens when camera is not used for 8 seconds.When this function is active, you can save power and get the maximum possible
84[ SET-UP]Use this function to adjust the LCD monitor brightness. Initialize (format) the Memory Card or internal memory for use with the camera.CAUT
85SettingsWhen this function is active and the camera remains unused for 2 or 5 minutes, it turns camera off.Use this function when you want to get th
86[ SET-UP]2 Move to [TIME DIFFERENCE] screen.3 Set time difference.CHECKAvailable time setting–23:45 to +23:45 (in 15-minute increments)MEMOCHECKUpon
87Camera ConnectionConnecting to a TVWhen connecting to a TV, images can be displayed on wider screen. Using slide show function (➝p.63) together, you
88Connecting Camera Directly to Printer — PictBridge FunctionWhen a printer that supports PictBridge is available, images can be printed by connecting
89Camera ConnectionSpecifying images for printing ([PRINT WITH DATE] / [PRINT WITHOUT DATE])MEMOEven if MENU/OK is pressed with total number of images
9Accessories IncludedMake sure that all the below accessories are included.Note that accessories may vary depending on model.• Rechargeable Battery NP
90Connecting Camera Directly to Printer — PictBridge FunctionPrinting with DPOF setting ([u PRINT DPOF])CHECKTo select [uPRINT DPOF], the DPOF setting
91Camera ConnectionMEMOPress DISP/BACK to cancel the printing.Depending on the printer, the printing may not be canceled immediately or printing may s
92Installation on a Windows PCPre-installation checklistZ Hard ware (software) requirements and recommended systemTo run this software, you must have
93Software InstallationDo not connect the camera to your PC until the software installation is completed.1 Install FinePixViewer as instructed by the
94Installation on a Mac OS XPre-installation checklistZ Hardware and software requirementsTo run this software, you must have the hardware and softwar
95Software Installation1 Turn your Macintosh on and start up Mac OS X. Do not launch any other applications.2 When the bundled CD-ROM is loaded into t
96Installation on a Mac OS X9 Change the Image Capture settings.Select [Preferences...] from the [Image Capture] menu.10Select [Other...] from [When a
97Software InstallationConnecting to a PCBy connecting the camera to a PC, your system can be expanded to fill a wide range of uses. Using “FinePixVie
98Connecting to a PCCAUTION• FinePix F480 / FinePix F485 is compatible with PTP (Picture Transfer Protocol)/MTP (Media Transfer Protocol). A PTP/MTP-c
99Software InstallationThe following steps differ depending on the PC’s operating system (Windows 2000/XP/Vista case)When your PC recognizes the camer
Related products and manuals for Camcorders Fujifilm FinePix F480
 (69 pages)
 (132 pages)
(125 pages)
(132 pages)
(7 pages)
(49 pages)
(166 pages)
(146 pages)
(164 pages)
(152 pages)
(61 pages)
(164 pages)
(59 pages)
(164 pages)
(116 pages)
(132 pages)
(132 pages)
(125 pages)
(132 pages)
(7 pages)
(49 pages)
(166 pages)
(146 pages)
(164 pages)
(152 pages)
(61 pages)
(164 pages)
(59 pages)
(164 pages)
(116 pages)
(132 pages)
 (120 pages)
(66 pages)
(120 pages)
(66 pages)
© 2020, manymanuals.com. All rights reserved. | 2.254 s |
 Manymanuals.com
 Manymanuals.de
 Manymanuals.fr
 Manymanuals.it
 Manymanuals.pl
 Manymanuals.cz
 Manymanuals.es
 Manymanuals-pt.com
Comments to this Manuals